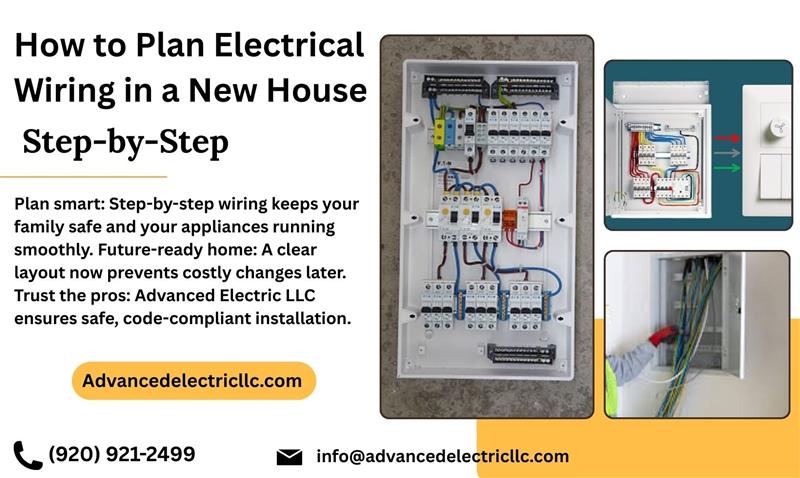
Planning electrical wiring in a new house is one of the most important parts of home construction. A properly designed electrical system improves safety, supports modern appliances, and helps prevent expensive repairs in the future. Poor wiring plans can lead to overloaded circuits, power failures, limited outlet access, and fire hazards.
Modern homes require more electricity than older houses because families now rely on smart devices, kitchen appliances, HVAC systems, entertainment equipment, and electric vehicle chargers. This is why creating a detailed electrical plan before construction begins is essential for every homeowner.
At AdvancedElectricLLC.com, professional electricians understand that proper planning creates a safer, more energy-efficient, and future-ready home. This complete guide explains how to plan electrical wiring in a new house step-by-step, including layout planning, circuit distribution, wire selection, outlet placement, safety considerations, and modern electrical upgrades.
What Is Electrical Wiring Planning?
Electrical wiring planning is the process of designing how electricity will flow throughout a home before installation begins. It involves determining the location of outlets, switches, lighting fixtures, circuits, and the electrical panel.
The main goal is to create a system that provides:
- Safe power distribution
- Efficient electrical performance
- Convenience for homeowners
- Support for future upgrades
A professional electrical layout plan also ensures compliance with local building codes and inspection requirements.
Why Proper Electrical Planning Matters
A poorly designed electrical system often creates long-term problems. Many homeowners regret not installing enough outlets, dedicated appliance circuits, or future-ready wiring during construction.
Common problems caused by poor planning include:
- Frequent breaker trips
- Overloaded circuits
- Unsafe extension cord usage
- Limited appliance capacity
- Failed electrical inspections
A properly planned system improves:
- Electrical safety
- Energy efficiency
- Daily convenience
- Long-term reliability
- Future expansion capability
Real-world insight: Most modern electricians recommend installing a 200-amp electrical panel because newer homes use significantly more electricity than older properties.
Step-by-Step Guide to Electrical Wiring in a New House
Step 1: Calculate Electrical Load Requirements
The first step in house wiring step-by-step planning is evaluating the electrical demand of each room.
High-power areas include:
Kitchens, laundry rooms, HVAC systems, garages, and home offices often require dedicated electrical circuits to safely handle higher power demands.
These spaces usually require dedicated circuits to prevent overloads.
Area |
Common Electrical Needs |
|
Kitchen |
Refrigerator, microwave, oven |
|
Garage |
EV charger, power tools |
|
Laundry Room |
Washer and dryer |
|
Living Room |
TV, lighting, outlets |
Professional electricians also recommend planning extra capacity for future appliances.
Step 2: Create a Room-by-Room Wiring Layout
A detailed electrical layout plan improves functionality and convenience.
Important considerations include:
- Outlet spacing
- Switch placement
- Lighting design
- Appliance locations
- Internet and data wiring
Recommended Outlet Placement
Room |
Recommended Outlets |
|
Living Room |
6–8 outlets |
|
Kitchen |
5–7 outlets |
|
Bedroom |
4–6 outlets |
|
Bathroom |
1 GFCI outlet |
|
Garage |
2+ outlets |
Real insight: Most modern homes require between 25 and 40 outlets depending on layout and lifestyle needs.
Step 3: Choose the Right Electrical Panel
The electrical panel distributes electricity throughout the home. Choosing the correct panel size is critical for safety and future expansion.
Most homes today use:
- 200-amp panels for standard residential properties
- Larger panels for luxury homes or high electrical demand
Professional electricians recommend leaving 20–30% unused panel capacity for future upgrades like:
- Solar systems
- Smart home devices
- EV charging stations
- Backup generators
Circuit Planning and Load Distribution
Proper circuit planning prevents overloads and improves electrical efficiency.
Dedicated circuits should be installed for:
- Refrigerators
- Ovens
- Water heaters
- Air conditioners
- Washing machines
- EV chargers
Separating large appliances ensures one device does not interrupt power to another.
Real-world insight: Kitchens usually require multiple dedicated circuits because several high-powered appliances may operate at the same time.
Types of Electrical Wiring for Homes
Understanding different wiring systems helps homeowners choose the best installation method.
Conduit Wiring
Wires are enclosed inside PVC or metal pipes for added protection. This method is common in modern homes.
Concealed Wiring
Wires are hidden inside walls for a clean appearance. This is the most widely used residential method.
Low-Voltage Wiring
Low-voltage wiring is commonly used for internet cables, security cameras, smart home systems, and modern doorbell installations. These systems improve connectivity, convenience, and home security while supporting today’s advanced residential technology needs.
Temporary Cleat Wiring
Usually installed only during construction work.
Copper wiring is generally preferred because it offers better durability and conductivity than aluminum wiring.
Wire selection is crucial for safety and efficiency.
Common wire gauges:
14-gauge wire → 15 amps
12-gauge wire → 20 amps
10-gauge wire → heavier loads
Key factors include the wire gauge based on the electrical load, the distance from the electrical panel, and the type of insulation used. These elements are important to ensure safe performance, proper power flow, and long-lasting reliability of the electrical system.
Copper wires are generally preferred because they offer better conductivity and durability compared to aluminum.
Sample Electrical Wiring Plan Example for a Small House (5 Marla)
Living Room: 6–8 outlets + fan + AC point
Kitchen: 5–7 outlets with separate circuits
Bedrooms: 4–6 outlets + fan + AC
Bathroom: 1 GFCI outlet
Garage: 2 outlets + optional EV charger
Real insight: A typical small house requires 25–40 outlets, depending on layout and usage.
Electrical Components Explained
Every residential electrical wiring system contains several important components.
Component |
Function |
|
Electrical Panel |
Distributes electricity |
|
Circuit Breakers |
Prevent overloads |
|
Switches |
Control lighting |
|
Wires & Cables |
Carry electrical current |
|
Grounding System |
Prevents electric shock |
A proper grounding system is essential for both safety and code compliance.
Permits, Codes, and Inspections
Electrical work must follow local building regulations and national safety codes.
- Permits help ensure: Safe installation, legal compliance, proper inspections, and insurance approval for electrical work.
- Most projects require: A rough-in inspection before walls are closed and a final electrical inspection after project completion.
Skipping inspections can lead to delays, safety hazards, and expensive corrections.
Rough-In Wiring Phase
The rough-in wiring phase takes place before drywall installation.
During this stage:
- Electrical boxes are installed
- Wires are routed through framing
- Circuits are organized
- Grounding systems are connected
Inspectors review the installation before walls are closed.
Professional electricians focus heavily on wire organization during this stage because clean wiring improves future maintenance and troubleshooting.
Final Installation and Testing
After construction is complete, electricians install:
After Construction Installation |
System Testing |
|
Switches |
Voltage accuracy |
|
Outlets |
Circuit continuity |
|
Lighting fixtures |
GFCI protection |
|
Circuit breakers |
Breaker performance |
Proper testing ensures the electrical system operates safely and efficiently.
Electrical Wiring Cost Breakdown
The cost of electrical wiring in a new house depends on:
Residential electrical wiring costs depend on factors such as home size, material quality, labor rates, and panel capacity. Smart home upgrades and advanced electrical features can also increase overall installation costs.
Item |
Estimated Cost |
|
Wiring Materials |
$1,500–$5,000 |
|
Labor |
$2,000–$7,000 |
|
Electrical Panel |
$500–$2,000 |
Average total wiring costs typically range between $4,000 and $15,000 or more.
Modern Wiring Ideas for Future Homes
Modern homeowners should prepare for future electrical needs during construction.
Popular upgrades include:
- Smart lighting systems
- USB charging outlets
- Home automation wiring
- Security camera systems
- Solar panel preparation
- Whole-home surge protection
- EV charging stations
Future-ready electrical systems improve convenience and increase property value.
Real-world insight: Electric vehicle charging installation is becoming one of the most requested residential electrical upgrades in new homes.
Electrical Safety Guidelines
Electrical safety should always remain the top priority.
Important safety practices include:
- Using correct wire gauges: Helps prevent overheating and electrical hazards.
- Installing GFCI outlets: Improves protection against electrical shocks in wet areas.
- Proper grounding: Enhances electrical safety and system stability.
- Avoiding overloaded circuits: Reduces the risk of breaker trips and fire hazards.
- Following electrical codes: Ensures safe, reliable, and compliant installations.
DIY electrical installation is risky and should only be handled by licensed professionals.
Common Electrical Planning Mistakes to Avoid
Many homeowners make avoidable mistakes during construction planning.
Common issues include:
- Installing too few outlets: Leads to overuse of extension cords and safety risks.
- Ignoring future upgrades: Makes later electrical improvements difficult and expensive.
- Poor switch placement: Reduces convenience and usability in daily life.
- Overloading circuits: Causes breaker trips and potential safety hazards.
- Choosing undersized electrical panels: Cannot handle modern power needs efficiently.
Example: Insufficient living room outlets often force homeowners to rely on extension cords, increasing fire risk and clutter.
Electrical Wiring Checklist
Before finalizing your new house wiring plan, confirm:
- All rooms have sufficient outlets
- Dedicated circuits are assigned
- Future upgrades are considered
- Panel capacity includes expansion space
- GFCI protection is installed
- Lighting placement is practical
- Smart home wiring is included
A complete checklist helps avoid costly changes after construction.
Maintenance and Future Upgrades
Electrical systems should be inspected regularly to maintain safe performance.
Important maintenance tasks include:
Regular electrical maintenance includes checking breaker performance and inspecting visible wiring to ensure safe and reliable operation. It also involves replacing damaged outlets and upgrading outdated panels to meet modern safety standards. When needed, adding new circuits helps support increased electrical demand and improves overall system efficiency.
As technology evolves, homeowners often add:
Modern homes are increasingly powered by advanced solutions such as solar systems that reduce electricity costs and support sustainable energy use. Backup generators provide reliable power during outages, ensuring uninterrupted comfort and safety. Smart devices improve convenience and control, while energy-efficient lighting helps reduce overall power consumption and lower utility bills.
Planning ahead makes future upgrades easier and more affordable.
Smart Electrical Wiring Planning for Safe & Efficient Modern Homes
Planning electrical wiring in a new house requires careful attention to safety, functionality, and long-term performance. A properly designed system improves daily convenience, protects appliances, prevents overloads, and supports future electrical upgrades.
By following a structured step-by-step electrical wiring guide, homeowners can create a safer and more efficient home while avoiding expensive mistakes later. Proper circuit planning, outlet placement, panel selection, and modern upgrade preparation are essential for building a future-ready electrical system.
AdvancedElectricLLC.com provides professional residential electrical wiring, panel upgrades, circuit planning, and complete wiring solutions designed for modern homes. Working with experienced electricians ensures your home is built with reliable, code-compliant, and energy-efficient electrical systems.
Need expert help with electrical wiring in a new house?
Contact our experienced team today to schedule your consultation and build a safe, efficient, and future-ready electrical system for your new home.
FAQs
Q1. When should electrical wiring planning begin?
Ans: Electrical planning should begin after the house design is finalized and before construction starts.
Q2. What type of wiring is best for residential homes?
Ans: Concealed conduit wiring is considered the safest and most commonly used method for modern homes.
Q3. How many outlets are typically needed in a house?
Ans: Most homes require approximately 25–40 outlets depending on size, appliance usage, and lifestyle needs.
Q4. What electrical panel size is recommended?
Ans: 200-amp electrical panel is suitable for most modern residential properties.
Q5. Should homeowners install electrical wiring themselves?
Ans: Electrical installation should always be handled by licensed electricians to ensure safety and code compliance.
Related reading: Learn more about budgeting for a whole home rewire.